Water filters are one of the most important inventions in the history of humankind. But, if you do not maintain it well, it might be a nightmare. The chances are that your whole house water filter might leak from the top due to improper maintenance.
Leaky filters could lead to sewage buildup in the walls and corners of your house, which can lead to further problems like mold or asbestos. This sewage buildup would have to be cleaned up by a reliable sewage cleanup in stamford or wherever it is you live. If there are further problems, you might need even more repairs. If there are further problems, you might need even more repairs. For instance, water damage can lead to foundation issues. Not to forget the walls that can get stained by water and look unappealing. In such cases, simple repairs might not just be enough. Instead, you might have to consider opting for an extreme renovation (apparently offered by firms like Multi-M Contracting Inc.) to restore the dwelling to its former glory.
However, if your house is not salvageable, either by repairs or renovation, then you can also consider selling it to a real estate firm. Wondering who would take a house like that? Well, there happen to be firms that are known to purchase houses in poor conditions. Since you may have goals like – sell my house fast Bellingham because you think that the value of your house may fall in the future if you wait, look for a company that matches the above-mentioned description and one which can offer cash and close the deal within a few days.
So, if you are someone who is going through the havoc of a leaking water filter, instead of paying a plumber a hefty sum of money, let us help you save cash. However, if your house is not salvageable, you can also consider selling it off to a real estate firm that may purchase your house in that condition. You may have goals like – sell my house fast Bellingham because you think that the value of your house may fall in the future. In that case, look for companies that can buy the house for cash and close the deal within a few days. Prior to that, you can do some minor home repairs to get a significantly high value for your home. For example, you can restore water-damaged areas with the help of a company that provides water damage restoration minneapolis (or a similar one nearby). In the same way, you can repair other parts of your home.
But, before hopping right into the repair part of it, we will first make you familiar with the precautions that you must follow.
How Can You Avoid Your Water Filter From Leaking?
Before jumping onto the ways you can fix the water filter leaking issue, we decided to give you a few tips and tricks by which you can avoid these issues and increase the lifespan of your water filter.
Let’s Get Started!
Stick to a Regular Cleaning Routine
Cleaning the interior of your water filter system is imperative to keep away from the build-up of foreign substances, sediments, or dirt in the filter.
However, do not use any cleaning agents to clean your filter.
No one willingly plans on adding harmful substances to their water.
Also, make sure that you sanitize all the parts of your water filter like caps, dispenser, assembly line, and so on.
New Filter Cartridges
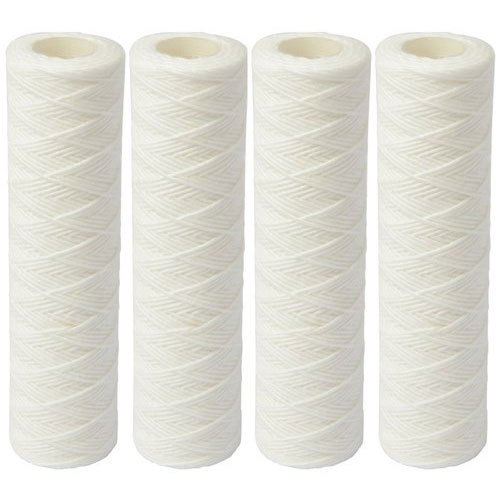
The best way to maintain your water filtration system is by changing its filter on a regular basis.
The control unit will tell you when the filter needs changing.
It might be indicated by a change in the color of lights on the filter or by a daily indicator.
Water Filtration System Replacement
Some Filtration systems have particular specific maintenance prerequisites like reverse osmosis filtration systems.
With specific kinds of water filters, it is crucial for one to pay close attention to the instructions given, as some cleaning agents might harm the filter.
Also, like the rest of your appliances, your water filter also has a limited life expectancy. But, with proper maintenance, you definitely can increase its life span.
A few issues that you may experience can be very easily fixed with a basic maintenance routine. However, you must remember that if you keep using an old filter, you might be putting yourself in danger by consuming contaminated water.
A good enough maintenance routine will work on the life expectancy of your filtration system for cleaner, better tasting, and better drinking water for you and your family.
If you keep these steps in mind, you might never face any issues with regard to your water filter. With that being said, let us now help you with a Step-by-Step Guide On How To Fix A Leaking Water Filter.
Step-by-Step Guide On How To Fix A Leaking Water Filter.
Step 1: Look For Leaks On The Exterior
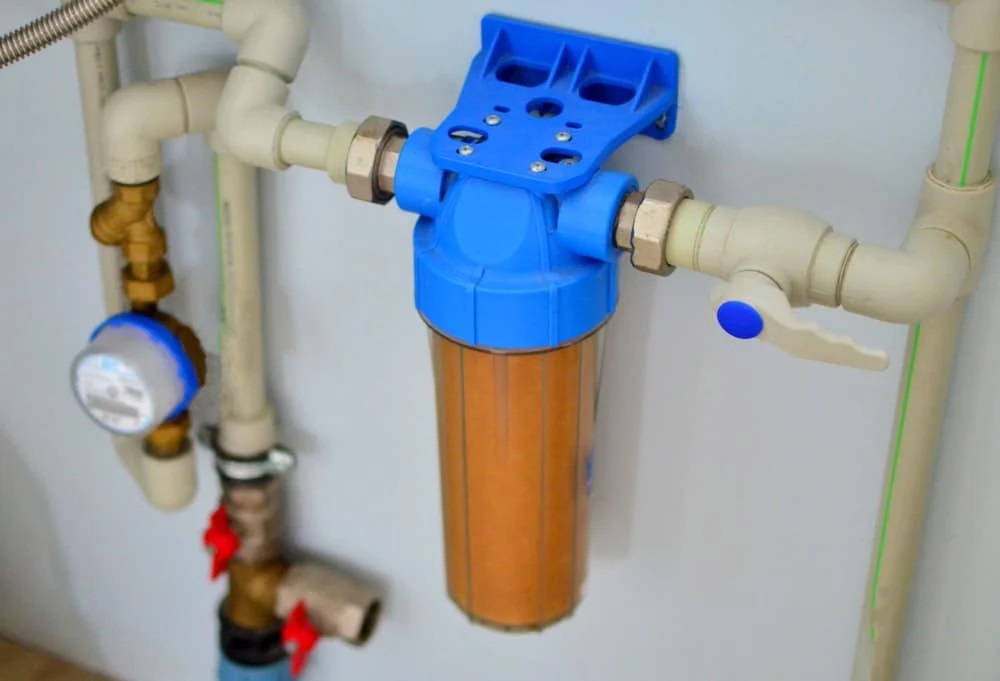
Before you plan on removing the entire house water filter housing, locate where exactly on top it is leaking.
Is it leaking from the threads?
Are there any cracks?
Is the pipe leaking, or is the pipe damaged?
If there is some noticeable damage/ crack along with the housing, you are most pretty lucky cause all you have to do is replace the filter instead of repairing the whole thing.
Step 2: Remove Whole House Filter Housing
If you do not see a visible leak in the whole house filter housing, the time has come to remove the filter body so you can investigate it properly.
The first and foremost step always is to shut down the water supply. After you have shut off the water, you can press the pressure release button on the top of the whole house filter.
And afterward, we suggest you open a faucet and drain all the water out of the filter. This way, when you remove the whole house water filter, you will not have to worry about your home flooding.
In case you have an ‘outlet’ shutoff valve, which is on the supply side of the whole house water filter, turn this valve off to avoid flooding.
Furthermore, before you remove the housing, it is a brilliant idea to put a container under the filter to get any water.
Step 3: Check the Rubber O-Ring
The moment when you remove the canister, very carefully remove the O-ring to check it for any potential damage and which might be the source of the leak. You can pry out the O-ring with a screwdriver or even tap the canister upside down, and the rubber ring might drop.
Clean the O-ring, and see if for scratches or damage. Is the O-ring still adaptable and damage-free? In case there is any damage to the O-ring, it needs to be replaced.
Furthermore, before re-installing the O-ring, it must be covered with a silicone lubricant to give it a robust seal. Also, make sure to clean the O-ring break on the canister in case it is dirty or has any debris.
Step 4: Examine The Housing Interior and Threads
After you are done assessing the O-ring, we suggest that you examine the housing interior and the threads. If you have a torch or a flashlight, it will be helpful to to notice the defects.
You might want to clean the interior of the canister and threads first so you can carefully see any hairline damages. Furthermore, remember to examine the threads on the housing. Also, do not just examine the threads on the housing but also where the housing is screwed onto and the top of the filter. And, in case you notice any breaking or damage on the housing or the threads, we strongly suggest replacing the whole filter housing than trying to fix it.
Step 5: Re-install The Whole House Filter Housing
If you could not track down any noticeable deformities or damage, the leaking may simply be an aftereffect of a poorly installed O-ring, or the canister was not tight enough.
After re-installing the filter into the housing, ensure that the filter is placed appropriately on the bottom (the areola should fit perfectly inside the lower part of the filter). Moreover, use the filter wrench to fix the canister back onto the system.
Step 6: Turn On Water and Inspect For Leaks
Once you are all set with the above-given steps, now is the time to turn on the water supply of your filter.
If your filter has a pressure release button, press the button.
Also, if you have an outlet shutoff valve (supply side), turn it on. We would like to emphasize turning the water supply on gradually since, in case that you turn on the water supply too fast, it can cause a leak.
Step 6: Turn On Water and Inspect For Leaks
Once you are all set with the above-given steps, now is the time to turn on the water supply of your filter.
If your filter has a pressure release button, press the button.
Also, if you have an outlet shutoff valve (supply side), turn it on. We would like to emphasize gradually turning the water supply on since if you turn on the water supply too fast, it can cause a leak.
Now very carefully assess the top of the filter using a flashlight. Mostly, lubing up the O-ring and re-fixing the canister should have stopped the leak.
We hope this guide helps you fix your whole house water filter quickly and gives you clean and safe drinking water.