Brita is one of the world’s most popular brands concerning water filtration systems. Their product range is extensive, giving an ideal choice for everyone based on their necessities and budgets.
Does your water supply tastes weird or has a different taste when it comes right from the tap? In that case, a water filter is a fantastic and super easy alternative to fix it.
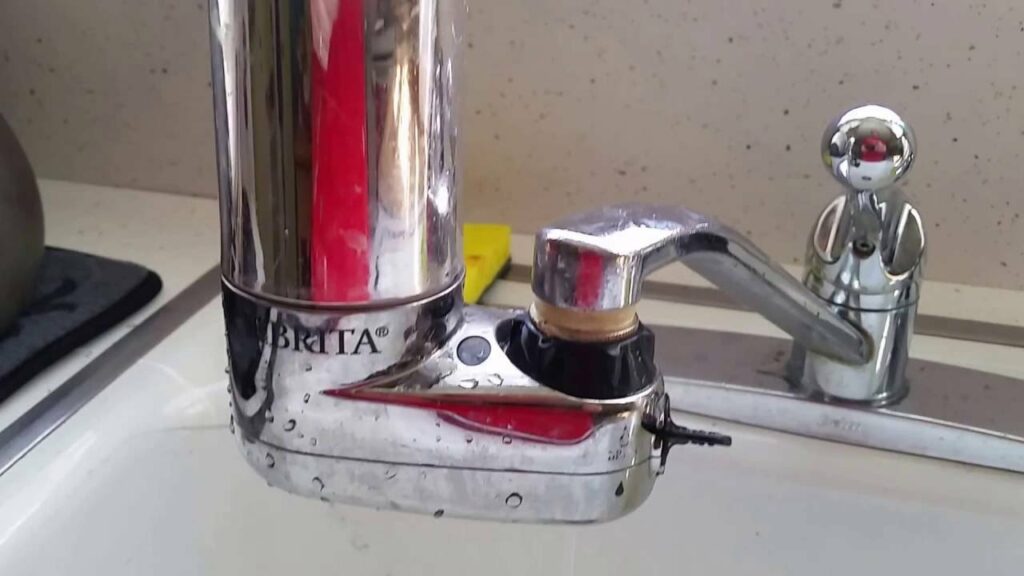
This faucet filter can give you great tasting tap water for cooking, drinking, and cleaning too.
Their design is sleek and compact and is usually made out of metal or plastic. They also come with a switch that allows you to change the stream size of the water to a bigger or smaller stream rate.
This switch also includes grip dots to give you security when washing the dishes so your fingers don’t slip.
Moreover, there is one more feature in this Brita filter: the setting feature to give you a spray option, which is very resourceful when washing off the dishes.
The Brita Filter installs quickly. It connects directly to the fixture with a metal connector for a safe and secure connection.
In any case, this system is not suitable when it comes to hot water.
Although the Brita Water Filter is an epic water filter, there might be chances that it is leaking or some other issues. This article will help you with How Can You Fix a Leaking Brita Filter Faucet and Why is it Leaking?
Let’s get started.
What is a Brita Water Filter?
We all might possibly know that water that comes from the tap may not be entirely suitable for drinking, consumption, and cooking.
Brita Faucet Filters intend to give you a solid, incredible tasting tap water at your home.
This results from removing around 60 or more foreign substances, including chlorine, asbestos, benzene, ibuprofen, and Bisphenol A (BPA).
Additionally, it lessens 99% of lead present in your water.
The Brita Filter claims to be NSF/ANSI Standard 53 and 42 and 401 Certified for the stated chemicals and contaminants that are removed through filtration. They have various types of filters as per your needs and budget.
Brita Faucet Filter Leaking:
Before you start with any kind of maintenance work on your Brita filter system, make sure that you read through all the information that has been given.
Acquaint yourself with the parts you will be working with.
When you purchase the filter, you will get each part needed to install and use your Brita Filter.
There will be a kit that includes two adapters for the faucet and O rings made of rubber.
These are very important elements of your water filter and play a pivotal role in fixing leaks.
The mounting collar, the lodging base with the filter cup, and replacement filter cartridges are made up of the mounting collar.
If any parts are missing, you must quickly contact Brita’s Customer Support.
You must have all the necessary parts so as to ensure flawless installation and maintenance.
In this article, we will talk about replacing:
- O Rings
- The filter’s housing base
- Circular thread caps
- Water filter cartridges
- Diverter that fits right into the faucet
O Rings are the rubber pads to help the metal joints between connection points of the faucet and the Brita water filter system.
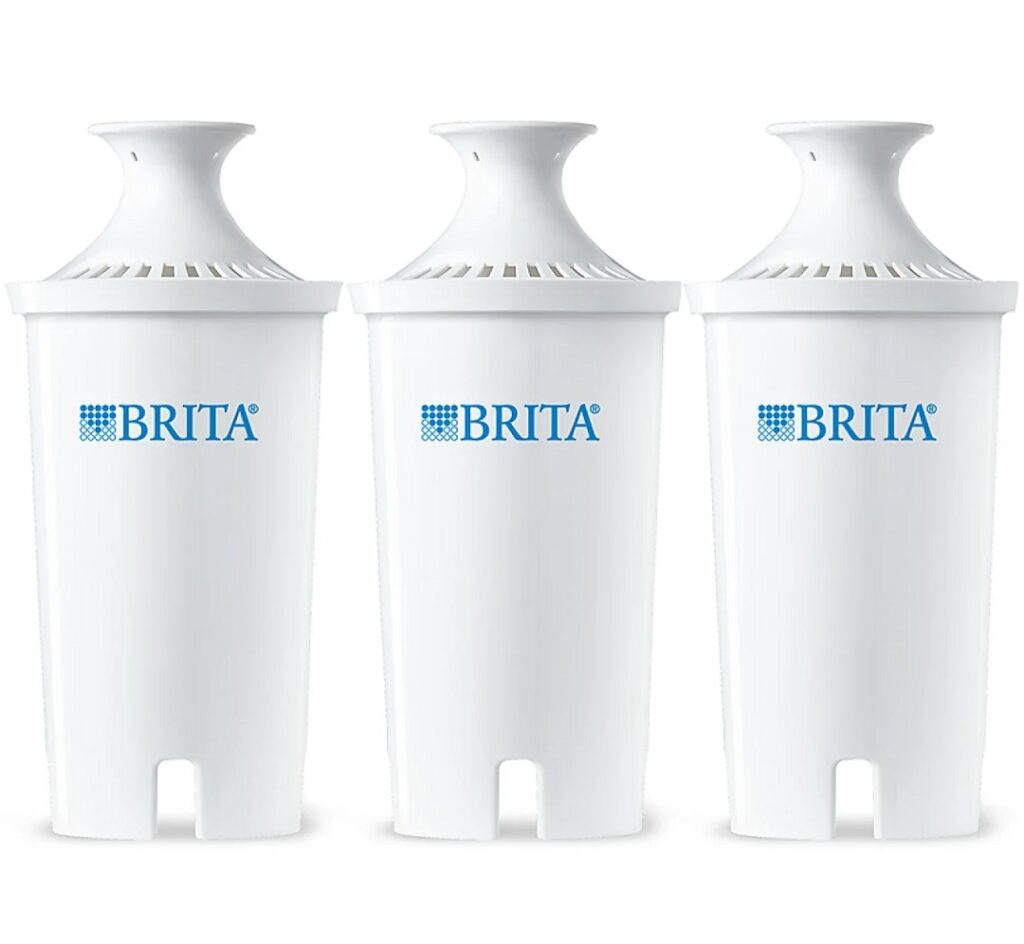
The water filter cartridges are the fundamental parts of this filter and are not difficult to find.
The filter housing base is the bottom part of the BRITA filter system.
This is the place where the unfiltered water passes from the faucet to the cartridge.
It then carries the filtered water for your consumption.
The Circular Thread Caps work contiguously with the O Rings and the diverter assembly parts to make secure and safe connections.
These parts could be the reason for the leakage and require maintenance to figure out the necessary steps in fixing your Brita Filter.
Where Is The Leak Coming From?
All leaks are accidental or undesired, so you must check where the leak is coming from before hopping on to the repairs for the damage caused by this water leak. For instance, the leak from your wash basin tap may have damaged a part of the wooden flooring. In that scenario, you might want to contact a Water damage restoration service Houston, TX, or in your location to repair the damage caused by the water. However, first and foremost, you must find the leaking point/points and get it fixed by a plumber. Once you are sure that there are no more leaks, you can call in the water damage restoration services.
Once you are done with this, you may need to find the leaking point/points and get it fixed. In that regard, consider getting the leaking points fixed by an experienced plumber from LaVergne’s Plumbing and Heating (https://www.lavergneplumbing.com/) or a similar plumbing firm in your area. Doing this can ensure that you never run into the chance of getting affected by water damage.
This is for you to understand what steps you will take to fix the apparent leaks.
It will also save you from further damage to the filter and will also save your claim for the product guarantee.
Water leaks or spills might be from a poor connection between the filter or the faucet.
When the source of the leak is recognized, you can finally continue with the maintenance.
Connection Of The System To The Faucet

Improper connection of the faucet filter may prompt a reasonable justification of the leak.
In such a case, identifying the issue early on is crucial because otherwise, the leak may lead to major water damage over time.
If this is the case, and the leak has caused additional damage to parts of the house, then consider calling in professionals from companies like Sparkling City Water Damage Restoration to handle and repair the damage for you.
As for the filter, a DIY job can make do if instructions have been understood.
The faucet filter should not be too loose or too tight, which may cause more issues like losing the tread cap.
In this situation, carefully check the condition of the washer in between the faucet and the adapter.
Always make sure to place the washer in contact with the faucet and not in the mounting collar as it might cause leakage.
Also, every Brita Faucet Water Filter comes with an Instruction Manual to help you in the best way possible.
Leaks Coming From The System Itself
Getting a proper filter cartridge position will safeguard you from long service ahead.
If not, this will for sure cause water leakage.
Before installing the filter, the nature of the material should be given careful consideration.
Ensure that you get what you pay for.
Leaks can also be caused by the accumulated contaminants that are present in the filter.
At the point when this happens, the flow rate of the filtered water slows down.
This may make the Brita Water Filter overfilled, and the water will find its way out of the Brita water faucet filter and end up creating leaks in the filter.
When you notice that the flow rate of the filtered water is slow, you should right away remove the Brita water faucet filter system and check the strainer from the mounting collar.
Reattach the Brita Water Faucet Filter System and if the flow rate is still slow, try replacing the filter cartridge.
This might be caused by a sediment build-up that can cause your filter to clog and hence, the leakage. Therefore, remove the sediments from your tap.
Leaking is Located in Between the Chrome Swivel Collar and Diverter Assembly
A chrome swivel collar is an expansion where the water emerges from.
The diverter is the connection piece of the water supply pipes.
The first and foremost thing to do is to ensure you shut down your water supply.
This will avoid leakage, too; after this, start with removing the spout or the Swivel Collar from the faucet’s tip.
then, find the rubber washer, which is commonly known as an “O-Ring.” Also, look for any signs of damage in the O Rings.
If the O Ring is damaged, this will require replacing and has a high chance of being the reason for your leaky Brita filter.
Then, reattach the Chrome Swivel Collar to the faucet thread caps.
Ensure this is on perfectly; start using your hand and then use the pliers to secure them tightly.
Turn on the water back and run the tap to initiate the filter and check if the filter is still leaking.
What to do if the leak is still there between the Chrome Swivel Collar and the Diverter Assembly?
This might be the reason if you are not using an adapter on the faucet.
Then, at that point, a thicker rubber O Ring is needed to ensure a much sturdier seal.
In any case, consider the possibility that your faucet is using an adapter and the water is still leaking?
This implies you need a more extended adapter fitted to give more space for the water stream.
Leakage Around the Circular Threaded Caps
This is in regards to the part that builds a seal between the Circular Threaded Caps and the filter housing O Ring.
Again, you should ensure that the water supply is shut before beginning with the maintenance and repair.
Start with removing the Circular Threaded Cap that is leaking by turning it toward the bolt that states loosen.
Whenever this is removed, you should make sure a rubber O ring is present at the lower part of the threads in the filter housing.
The chances are that one of the O Rings might be missing, and you might have to get a new one to seal it off again completely.
Assuming all O Rings are in place, continue checking for any damage to the ones there. And, if one of them is damaged, simply replace it.
With all O Rings set up and in great condition, reassemble the Circular Thread Cap onto the filter housing.
This is finished by flipping it on the other side by loosening it. These O Rings act as cushions between the parts.
This is done to close and seal the gaps for water to get away possibly, so it is a fundamental part of your Brita Filter on the faucet.
But again, make sure that you don’t shut the O Rings too tight. If this does not help and the leakage persists, you can try replacing Circular Threaded Cap.
Leaking is Located Around the Base of the Filter Housing and Not From Around or In the Center of the Caps
To wrap things up, this is the most terrible of the leaks. This cannot be repaired. You will have to replace it.
The filter lodging is the fundamental part of the Brita filter.
This is the place where the water goes through to remove the contaminants and cater you with clean and fresh drinking water.
What to do if your water leak is coming from the base of the Brita Filter?
Then, at that point, this is a sign that the housing is damaged or broken, and this will require replacing.
In this case, it is also advised to replace the thread caps when you replace the housing.
This helps in ensuring that you are leak-proof.
We recommend reaching out to Brita’s Customer Care for this situation to report the damage and ask for a replacement.
If you are still within the guarantee period, they will help you get your hands on new parts.
When To Replace Brita Faucet Filter
The Brita water filters for faucets are very well-designed with colour-coded indicators that make it very easy for users to monitor Brita water filter usage.
Here are the colour indicators and what does each colour mean:
GREEN – Indicates that the Brita water filter has been installed rightly and is working appropriately.
The GREEN colour light is the ideal stage for the best performance of the Brita Faucet Filtration System.
Half RED and GREEN – The Brita Faucet Filtration System might need a replacement soon.
RED – The red light indicates that the Brita Faucet Filtration System has come to an end of its cycle now and needs a quick replacement.
Maintaining and Replacing Brita Water Filter Cartridges
It is crucial to keep up with the maintenance of any water filter and regularly change the filter for ideal performance.
Regular maintenance helps in increasing the lifespan of your filter.
Avoid using vegetable oil as a lubricant for housing the O Rings as this can make the plastic and rubber parts break down.
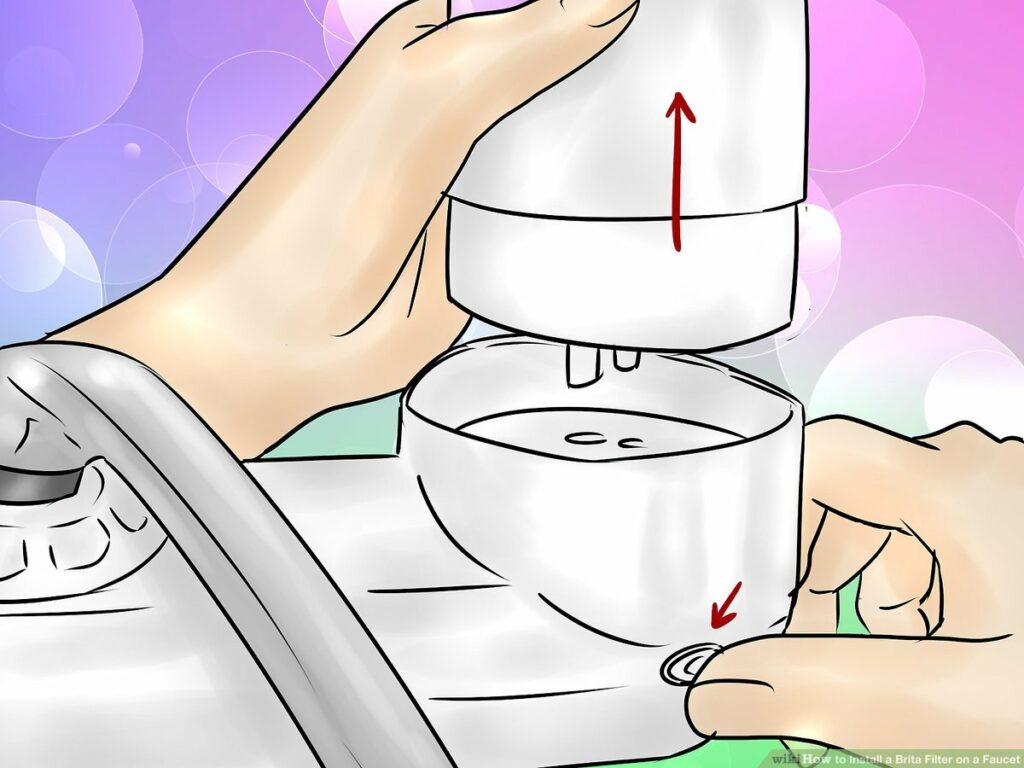
Use the below-given steps while changing the filter cartridge on your Brita Water Filter:
- Press the filter cartridge release button at the rear of the filter cup housing.
- Remove the cartridge by pulling the cartridge up and away from the housing.
- Find the groove on the lower part of the new filter cartridge.
- Align the Filter Replacement Indicator at the front of the filter cup in the housing body.
- Push it down firmly yet not very quick to insert the new filter cartridge into the filter cap on the housing.
- You will hear a solid click when it is set up and secured.
- Make sure to flush water through the faucet for around five minutes to remove any sediments accumulated within the system.
- Do this to activate the new filter.
- You should screen and change the filter cartridge every six months.
Well, that was about replacing the filter.
At this point, you must have learnt how to maintain your Brita Water Filter and How to Fix A Leaking Brita Water Filter.
We trust our in-depth detailed guide, and you must have already fixed your filter.