Fluoride always occurs naturally in water and is often added to drinking water to promote oral hygiene.
Nonetheless, fluoride is possibly risky in amounts over 0.7 milliliters (0.024 fl oz) per 1 liter (34 fl oz) of water.
To precisely detect issues in your water supply, take a sample to a state-authorized testing lab.
Likewise, you can purchase testing kits or strips that detect fluoride and even measure the exact amount of fluoride present in the water.
Assuming you see your water supply is polluted, use a test to make you aware of potential dangers so you can regard the issue as quickly as time allows.
How To Test Water For Fluoride?
In this article, we have got you a couple of ways by which you can quickly test water for fluoride.
Before we start, If you are just looking for a good filter, Read Best Water Filters to Buy instead.
Method 3: Using Testing Strips
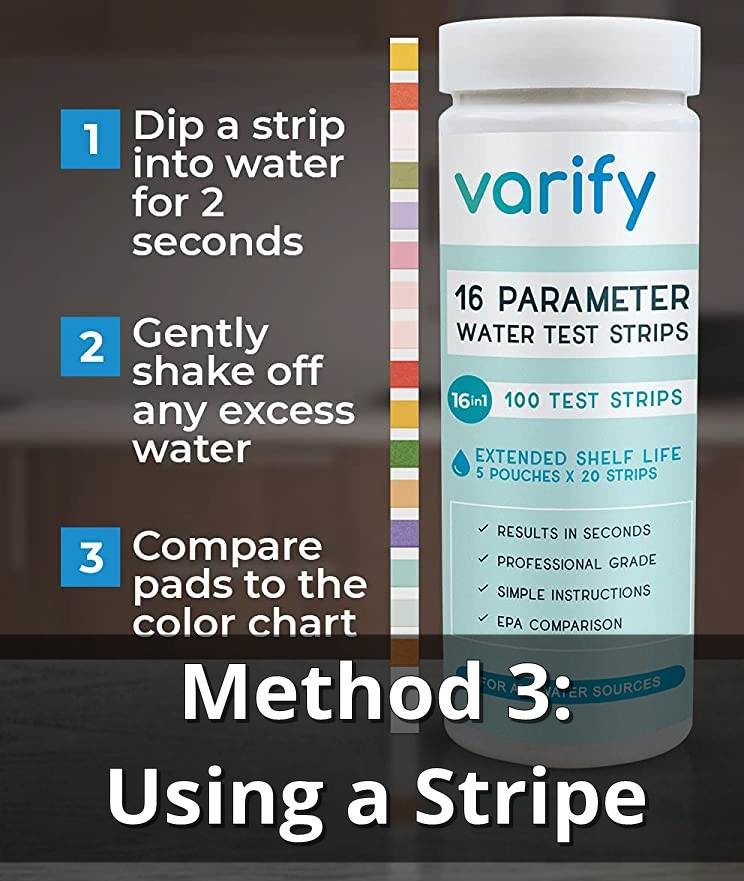
Step 1: Buy testing strips that detect fluoride.
There are different test strips accessible to use for fluoride detection.

The basic sort is the similar kind used on pools and different sources of water.
These strips detect lead, pH levels, and different issues notwithstanding fluoride.
Different strips detect just fluoride.
Water testing strips are accessible on the web and at numerous hardware and pool supply stores.
Test strips are not quite as precise as photometers or reagent dyes.
The strips can detect fluoride and typically provide you with a scope of how much may be in the water. They do not give a definite measure.
Select a freshly cleaned glass or container for the test.
Make sure to flush the container out with a dish cleanser and boiling water a few times prior to using it for the test.
Step 2: Select a freshly cleaned glass or container for the test.
Make sure to flush the container out with a dish cleanser and boiling water a few times prior to using it for the test.
Ensure you do not see dust or other debris left behind. When you wrap up drying the container, cap it, if conceivable, to keep it clean until you are prepared to start the test.
A few tests call for acid to be used.
Assuming you have strips that detect just fluoride, you might have to use acid.
Pick a glass container to keep away from any chance of the acid eating through the plastic.
Step 3: Fill the bottle with around 10 milliliters (0.34 fl oz) of water.
As a rule, fill the container half full.
With that amount, you can, without much of a stretch, lower the testing strip, making sure that you get the most reliable outcome possible.
This likewise leaves you with a lot of room in the event that your test kit expects you to blend something into the water.
Run the water for about two minutes at a cold or tepid temperature, assuming that you are testing water from a tap.
Collect the sample just before you expect to test it, and seal the container on the off chance that you can not finish the test properly.
Refrigerate the sample to keep it clean and prevent further contamination until you are prepared to use it.
Step 4: Add muriatic acid to the sample assuming the test requires it.
Assuming that you are using fluoride-only strips, the producer might guide you with acidifying the sample.
To do this, add an equivalent measure of muriatic acid or hydrochloric acid.
For instance, assuming you have 10 milliliters (0.34 fl oz) of water, fill the other portion of the container with 10 milliliters (0.34 fl oz) of the acid.
Wear a long-sleeved outfit, gloves (which can be purchased from this site-unigloves.co.uk), a face mask, and a respirator mask while taking care of the harsh acid.
Muriatic acid is accessible at most hardware stores and pool supply stores
Step 5: Submerge the whole strip in the water for a couple of minutes and then take it out.
Drop the strip in the water for something like 2 seconds.
Try to get the whole strip underwater, although the test frequently works when you just drop the strip on top of the water.
Then, at that point, remove it immediately with a pair of tweezers or another tool.
Shake the excess water off of the strip to keep it from proceeding to retain dampness.
Assuming your test includes acid, ensure you are wearing acid-safe gloves or use an extra pair of tweezers.
Wash them clean immediately to prevent any possible damage.
Step 6: Compare the test strip with the colors on the kit.
In the event that your kit does not have a different color chart, check for one imprinted on its crate.
The test strip changes colors within 30 seconds, so move it to a place with good lighting to decide its color.
Check the diagram for a matching color showing fluoride, and its amount is in the water.
Different colors indicate different fluoride levels in the water, yet this varies from one test to another.
Generally, a dark color shading shows a higher fluoride level, yet this is not consistently the case.
Most multipurpose strips get darker as they detect more fluoride.
Fluoride-only strips frequently get lighter in more significant levels of fluoride.
Counsel the color chart for the exact fluoride level demonstrated by the color that turns up on the test strip.
Method 2: Using a Reactive Testing Kit
Step 1: Buy a testing kit that detects fluoride in water.
There are perhaps a couple of choices for home fluoride testers.
The most reliable sort is an electronic sensor called a photometer, which shows the test results on an electronic screen.
The color tests are comparative, yet you need to differentiate the water color with a diagram included with your test kit.
The two tests follow a similar method and expect you to blend a dyed color into a water sample.
Testing kits are available on the internet and at some home stores.
Make sure to check the reviews for the tests first to decide how well they worked for different clients.
Remember that home tests are not quite as precise as the professional ones from certified research centers.
Many home tests detect fluoride yet can not precisely decide its amount is in the water.
Step 2: Pick a freshly washed plastic bottle with a cap.
Plastic medication compartments and dispensable jugs are a couple of examples of containers to use for the test.
Continuously wash the holder out a couple of times with a cleanser and water to remove any microbes and flotsam and jetsam that could influence the fluoride test.
Complete the process of drying out the container with a clean cloth, then, at that point, cap it until you are prepared to use it.
Many kits incorporate little jugs to use for the test. Wash the container and cap regardless of whether they look clean.
Fill the bottle with 4 milliliters (0.14 fl oz) of water.
The specific amount of water you really want for the sample differs from one test to another; however, it is a limited quantity.
Many testing bottles from kits have a line to show you how much water you need.
On the off chance that yours does not have one, top the bottle off as far as possible with water from the source you wish to test.
Gather the sample just before you plan on testing it.
You do not have to stand by to a particular time or make any extra strides.
In the event that you can not test it immediately, seal the bottle and refrigerate it.
Assuming you are taking the sample from your tap, run the water for around 2 minutes.
Gather the water while it’s tepid or cold.
Assuming you are mailing the water from another area, for example, from a well or pool, consider getting another clean bottle.
Use that bottle to bring the water inside, then, at that point, pour some of it into the testing bottle.
Step 3: Add the reagent to the sample as indicated by the producer’s directions.
Look at the inside of your testing kit for a bottle of what resembles a red dye.
This dye is the reagent that reacts when it is exposed to the fluoride present in the water to finish the test.
By and large, you really want around 15 drops of the reagent for the test; however, this might change a little depending upon the test you have.
Continuously look at the maker’s guide to guarantee the test goes smoothly.
On certain tests, you might have to mix a powder into the water prior to adding the reagent.
Assuming your test has a powder, really look at the maker’s directions to decide the amount you want. As a rule, you need to add about a spoonful of it.
Step 4: Cap the container and shake it for around fifteen seconds.
Firmly seal the container, so nothing gets in or out.
At the point when you are done, move the container to spread the reagent.
Continue to shake it until the water has a uniform red tone, demonstrating that the dye has been dispersed equitably.
Another option is to mix the water around.
Ensure you use something clean, similar to a washed coffee stirrer, rather than your hands.
Assuming your test kit includes a powder to add, shaking the container additionally disseminates the powder and breaks it down.
Slide the sample into the photometer, assuming you are using one.
A photometer is a little sensor that detects electromagnetic changes in water.
It appears as though a tiny scale with an electronic screen fastens. Aside from it likewise has a round opening in it.
Squeeze the sample container into this opening, and then, at that point, the readout will appear on the screen.
In the event that the photometer does not work, have a go at adjusting it first.
Slide an unfilled container into the opening prior to actuating it. Ensure the readout shows a 0 preceding changing the unfilled container out for the sample.
Step 5: Compare the watercolor with a shading diagram on the off chance that your test kit has one.
The reagent turns the water a perceptible red tint on the off chance that fluoride is present.
Observe the color chart in your testing kit and hold it next to each other with the sample in a sufficiently bright area.
Match the specific color to the diagram and search for the related fluoride level printed nearby.
For the most part, dark-colored water demonstrates a higher fluoride level, yet this might differ from one test to another.
Method 1: Getting A Lab Test
Step 1: Find a water testing lab in your space.
Visiting a state-certified lab is the most dependable method for finding out about what is in your water.
Ask your local government or environmental safety organization for a rundown of labs in your area.
These labs are available to people in general, so stop in or call for more data about the testing procedure.
Assuming you are in the United States, for instance, look for certified labs on the EPA’s site at https://www.epa.gov/waterlabnetwork.
Home tests can detect fluoride yet struggle to measure the fluoride level in the water.
Labs have better equipment, so visit one on the off chance that you really want a more exact readout.
Step 2: Wash out a plastic bottle to clean it.
Pick a clean bottle, or else you might compromise your test.
The bottle needs to have a safe cap or top to keep the sample from spilling or getting debased during transport.
To set it up for use, wash it out completely with cleaner and water, then, at that point, get it dry with a new, clean cloth.
Assuming that you are anticipating doing a full water test for microbes and other toxins, sanitize the bottle first.
Drop it into a vessel of boiling water for 5 minutes prior to using it to gather a sample.
A few labs offer free testing bottles.
Request a clean one assuming you are doing a full water test; however, using a disinfected bottle is not important to detect fluoride.
Step 3: Gather 150 milliliters (5.1 fl oz) of water in the container. Most labs need just a little sample to play out the test.
Gather the water directly from the source just before you plan on submitting it to the lab.
Cover the sample properly to make sure that it does not get contaminated any further.
Also, do not store it in some other container and then in the actual one.
Assuming that you are taking a sample from your tap, let the water run for around 2 minutes at a cold or tepid temperature.
On the off chance that you can not present the sample immediately, freeze it in the refrigerator to prevent any expected tainting.
Counsel the lab’s testing strategies for specific directions, like what test size you really want or how to store the sample.
A 150 milliliters (5.1 fl oz) test is, for the most part, all that could possibly be needed. Get the sample for testing as quickly as time permits.
Step 4: Name the sample with the date and area you took it from.
Appropriate marking is significant for monitoring the water sample.
Use a good quality marker to write the date, time, and area on the container.
You could get a sticker mark or sticky note to attach to the holder too.
Marking the container is exceptionally helpful in the event that you plan on mailing the sample or, on the other hand, assuming the testing office tracks fluoride levels in your space.
Appropriate marking is likewise exceptionally helpful, assuming that you plan on presenting different samples.
For example, you might wish to test ground wells and different water sources near your home.
Step 5: Carry the sample to the lab and pay the testing fees.
When you have your sample, all that is left is to get it to the office.
Drive to the office to drop the sample off.
A few labs additionally permit you to post a sample through your local mail service.
If you’re wondering how much does it cost to get to test your water for toxins and fluoride, The testing fee commonly goes from $15 to $30, contingent upon the lab, and you can pay with cash, a check, or a Mastercard.
A few labs send an expert out to your home to gather a sample.
This service costs about twofold the standard testing cost, yet it could be more advantageous for you.
And with that, we have now come to an end to our guide on how to test fluoride levels in the water. We hope they work out well for you and your family.